Mapping Workflow, Keeping Your Sanity for the Extra Long Projects
If you’re even reading this right now it’s because you use Hammer editor, and know that is can be a black vortex of your time. Knowing how to work through a project without giving Hammer too much of your time is always a wonderful thing to do. You could be spending that time on having a life in the great outdoors, or making another level in hammer. So with that you are the artist, and that newly created map file is your canvas. Lets turn it into something wonderful.
Planning Stage
Planning your level can do wonders for the time spend creating the level. It also helps reduce the amount of reworks that do you because you think that you can do better. When planning your level out you should know your skill cap, and the limitations of hammer along with the engine. Planning to do something that you can’t, or something that is impossible for the engine is a waste of time and will make you feel like crap for wasting your time on it. So keep it simple, working around you. If you see something in another level and want to emulate it for your own level but don’t know how find out. You can either contact the creator of that level and ask for help on the situation, or decompile the level. Now when I say decompile the level, I’m saying this as a learning purpose only. If you go and just copy what they have made you’re not learning anything, you’re just hurting yourself.
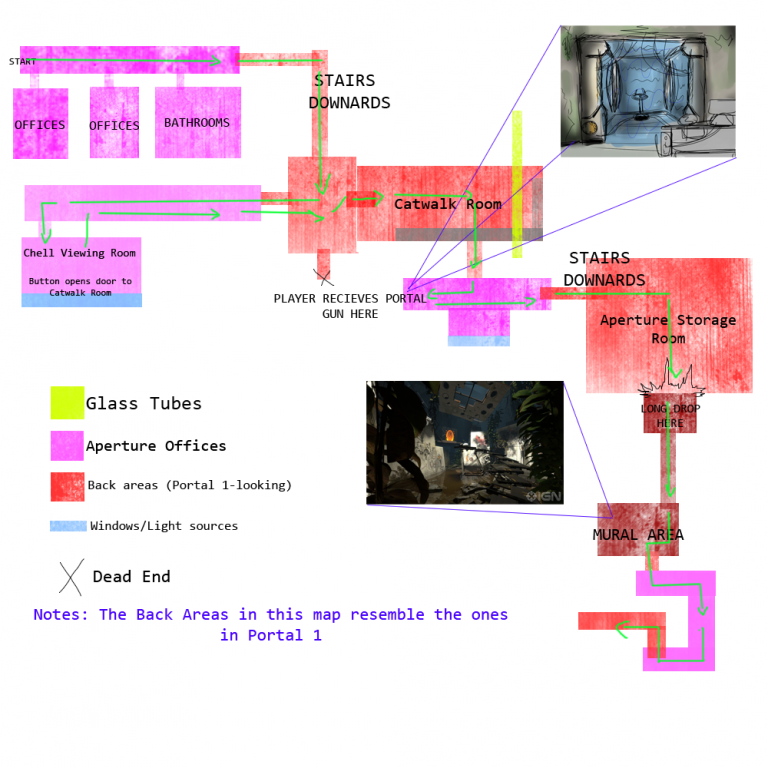
Once you have the idea in your head you might want to get it onto paper, or some other form or medium that you can store it in. You don’t need to be Van Gogh with your design when putting it onto paper. You are most likely the only one that is going to be looking at in anyways. Here are some of the doodles that my Lab Rat team have come up with for designs.
As you can see they are by no mean pretty, but they get the point across. You mainly want it to prevent you from forgetting what you wanted to do. You might find that you will constantly get ideas for your level just going about your daily life. I get a lot of mine right before bed and I keep a notebook near by so I can jot them down before I go to bed. If you’re not the kind of person to doodle, then you can always just make a rough outline in hammer with the dev textures. It takes no more than 20 minutes to lay out an entire level.
Start Mapping
You now have your layout, and you’re most likely feeling like you’ve gotten a lot done. This is in fact not that case! I don’t want to burst your bubble but the longest part has just begun. You now start building your level in hammer, for all of the screenshots in this I’ll be using one level that I’ve made. (a level for Portal 2 Lab Rat.)
You might not even know where to begin your level, believe me we have all been there. I’m also sure we all start at the same spot, the player spawn. It’s best to make your level the same way you play it, start to finish.
You can now build your level in two different ways:
- You can build in passes. When building in passes you doing things 1 pass at a time.
-
- You do the brush pass. You lay out the entire level in brush. Place no models, and do no detail work at all.
- Functionality pass. You then go back and all of the functionality parts of the level. This is stuff like doors, entity systems, anything that the player HAS to do to complete the level.
- Detail pass. You go back, and add full detail to your level. In this you would place all of your models, lights, sounds, and everything else that your level is missing.
- Test pass. You test the entire level, then go back and fix what you found to be broken.
- You can build in areas/steps. When building like this you build like the pass method, but you do it one room at a time. You fully complete one room, before moving onto another room. You are basically breaking down the map into little maps, and finishing them faster.
Work Flow, and Time Management
Your time is precious, and you need to spend it wisely. This can be done by having good work flow, basically a lot of little things to help speed up the total process. One of the biggest things that you can do to speed up mapping is to use the mouse as little as you can. No matter how fast you may think you are with it the keyboard is always faster. So use hot keys, the time you spend by pressing the hot key is less then moving the mouse from where ever it to to Edit->Map properties. Here is a complete list of Hammer’s hot keys to help you speed up the process. Hammer Editor Hot Keys. Once you’ve started using hot keys you should find that the whole process is a little faster, does it not feel good to be a keyboard warrior?
The grid is a wonderful thing to help stay organized, and hammer enjoys when things are on it as well. Without getting to much into optimization the grid helps you stay sane, because there won’t be a ton of lines scattered all over the place.
Sense vision is so important to us we need to help keep it clear. While starting the level off you can see everything fine because there is not much there yet. But give it time, soon your level will be filled by your masterfully placed brushes, and props. Yet when the grid gets too cluttered you’ll need to clean it up, and you’ll use vis groups for this. They allow you hid certain things from your level so you have better vision of what you’re working on. You can also toggle prop, and displacement from bring drawn to just the bounding box. To toggle this just click the “Toggle Models in 2D” button, it’s located 2 icons to the right of “Run map” and looks like this:![]()
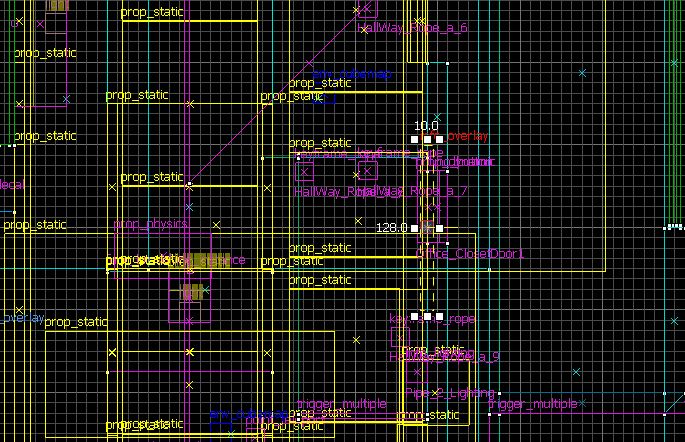
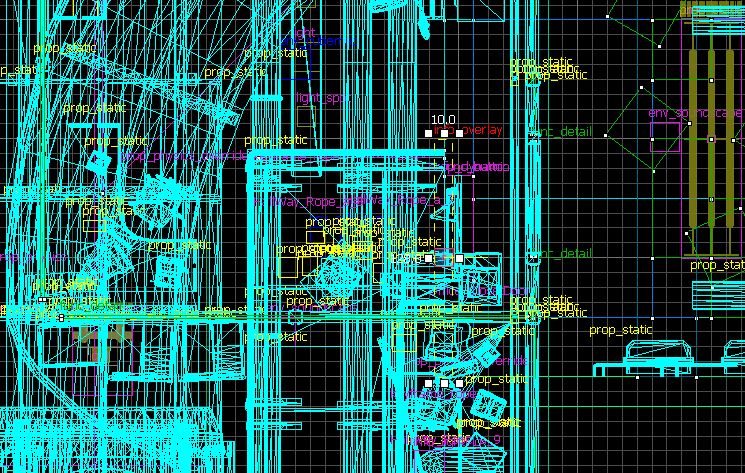
Here is what it looks like when you have them enabled, and disabled.
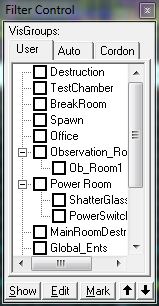 You can see that on the left there is so much more going on, and it’s hard for me to see what I’m doing. Where as on the right I can see exactly what I’m doing. You can see my vis group’s filter control to the left. In it I have my map organized into the areas of my map, I can easily toggle what I do and don’t want to see. If you want to know how to create vis groups you can watch: Tutorial 39, Vis grouping.
We all like to test what we’ve just made, and sometimes we are doing a lot of testing because of the guess work we are doing. But with every test you are required to compile your level. Depending on how good your computer is, and how well the level is optimized the compile can take anywhere from 5 minutes, to 3 hours. Knowing what compile settings are needed to test your level are very important. If you’re just testing entities you don’t need VVIS or VRAD, so you can just compile with VBSP. The level will be laggy, but you will only spend 15 seconds compiling, compared to the longer compile time including lighting and vis data.
But testing lighting information can be a little longer, because VRAD needs to fire rays so it knows how to light your level. You can test certain level of you area by using the cordon tool. ![]() When you use the cordon tool it hides everything outside of the cordon box, and seals the map from leaks. This will allows you to test lighting much faster, because you’re only compile a room, as opposed to compiling the entire level to just test said room.
When you use the cordon tool it hides everything outside of the cordon box, and seals the map from leaks. This will allows you to test lighting much faster, because you’re only compile a room, as opposed to compiling the entire level to just test said room.
Finalizing
You are now moving on to last bend of the mapping process, finalizing. At the end of this is a check list on how to finish up a level, but I’ll write out some of my thoughts on the process, but the check list is king!
There are a few things that you need to do, make sure you have cubemaps added to your level. The cubemaps are what the engine use for cheap reflections. Add them, then buildcubemaps. Then you need to make sure the FPS is acceptable in your level, this means optimizing your level, not one likes it but it has to be done. If you don’t know how to do this watch: Tutorial 21, Optimization. Then compile your level on normal settings, you don’t want to do a final compile here because you’re just doing a test run here. (If you want to test with the advanced compile settings you can.)
Next run though your level, find any and all bugs that you can and fix them. Next you’ll want to send your level off to some testers, don’t send it to everyone on your friends list. Once you’ve sent it to your tester(s) make sure they know it’s a beta, and that they are to find any problems they can. Listen to them, I’ve made this mistake before thinking that I knew what was best. Not everyone thinks like you, you may have made things hard to find and will need to place some hints to nudge the player along in the right direction.
After you’ve fixed all of the problems that your testers have found fix them, then run though one more time and see if you have made any more problems by fixing the previous bugs. If you’re all good then pack the level (if needed, you’ll only need to do this if you have custom content in the level.) After the packing you are all done!
I hope that this is what you guys meant, and wanted by a “work flow” tutorial, if you feel I’ve missed anything let me know and I’ll try to fix it when I can. Thanks, and happy mapping!!! <3
Finalizing a level check list
- Add env_cubemaps to your level.
- Optimize your level. (If you don’t know how, watch THIS)
- Do a rough compile of the level. Compile with VRAD and VVIS set to normal.
- If compile takes long on VVIS, Go to your level and make sure you have func_detailed the correct things. (If you don’t know what “func_detail” is, watch THIS)
- Build cube maps, type: “Buildcubemaps” in console for this.
- Play through your level for about an hour or more. Look for game play and visual flaws, then correct them. If none Start back at #3.
- Get (a) friend(s) to play your level, have him/her look for game play and visual flaws, then correct them. If none Start back at #3.
- If your map has passed the testing phases you can move on to the Final Compile
- Settings up a final compile takes a few steps, first click “run map”
- Click “Expert”
- Click “Edit”
- Select Default, and Click “Copy”
- Name it: Final Compile (Slow)
- Select “Final Compile (Slow)” from the drop down.
- Under “$light_exe” add the following to the parameters, before “-game”: -final -textureshadows -hdr -StaticPropLighting -StaticPropPolys
- Add a new command, put: $light_exe in the command area.
- Add the following to the newly created commands parameters: -final -textureshadows -ldr -StaticPropLighting -StaticPropPolys -game $gamedir $path$file
- Move the new command to be above the old $light_exe command.
- Compile the map under the new compile settings.
- Build cube maps again, type: “Buildcubemaps” in console for this.
- Toggle HDR modes. (If it’s on, turn it off. if It’s off turn it on)
- Build cube maps again under the new HDR settings, type: “Buildcubemaps” in console for this.
- Close the game.
- Pack all your custom content (if any) into your level using: PakRat, VIDE, MAN, or PackBSP. (PackBSP does the best job)
- Remove your: Materials, Models, and Sounds folder from your root directory of your game. (Rename them, move them to desktop. Just make the game create new ones)
- Load the packed level, make sure the map packer got all of the custom content into the level. If not, go to step 13 and try a different packer.
- If everything is good to go. Release the map.

